CDN
CDN endpoints route HTTP(S) traffic through bunny.net’s edge network, improving performance and reducing latency based on user location.For more information about CDN, see our CDN
documentation.
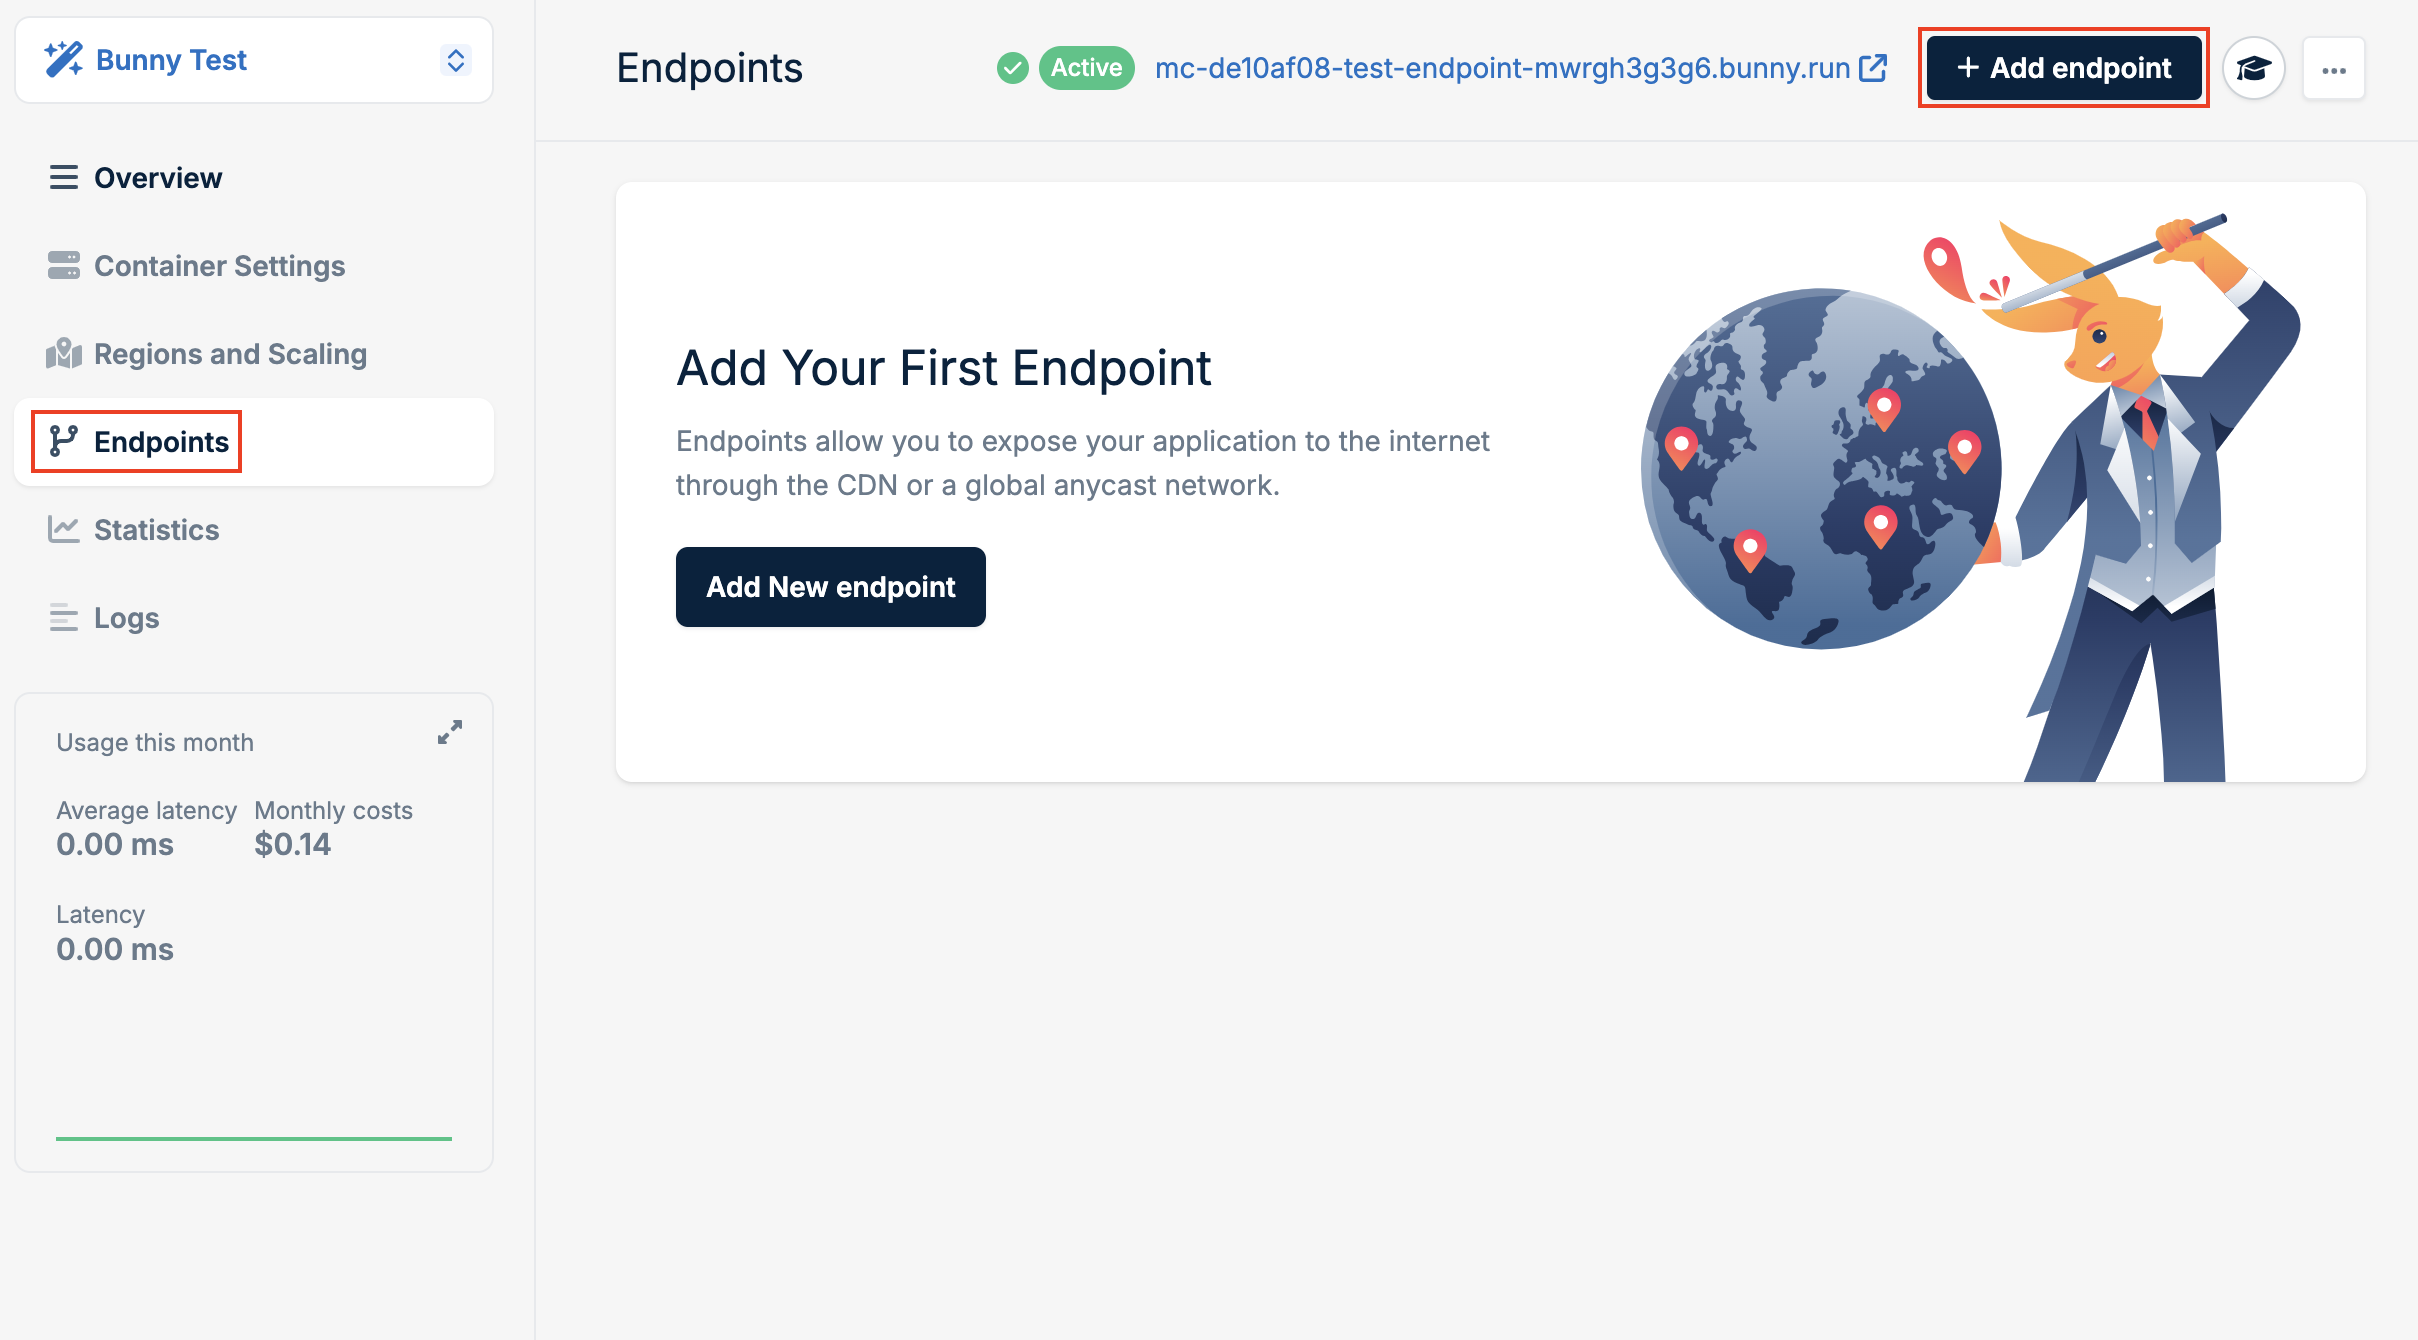
- Go to Magic Containers and select your container.
- Click Endpoints, then Add New Endpoint.

- Select CDN as the type.
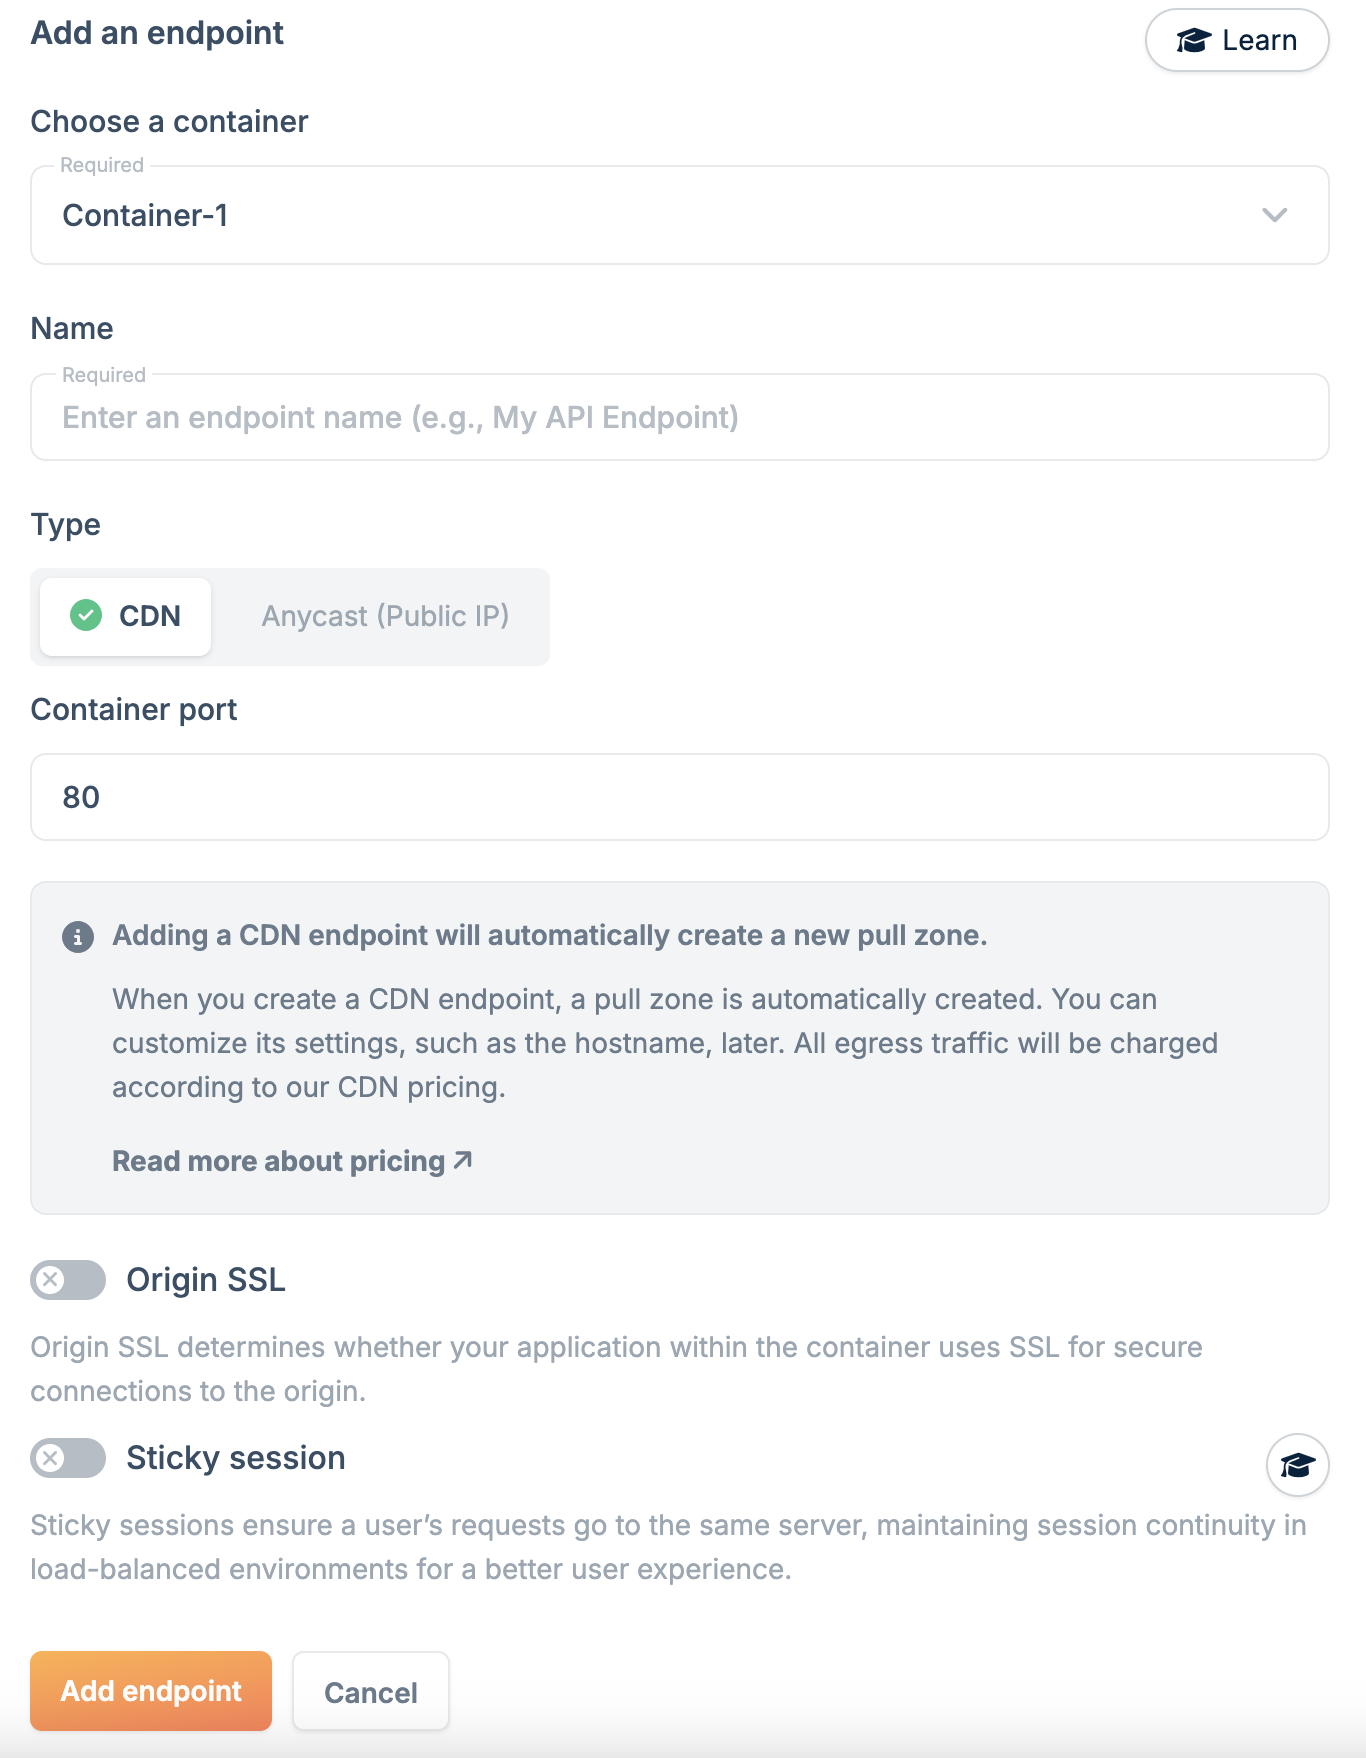
- Configure the endpoint:
- Name: A unique name for this endpoint.
- Container Port: The port your application listens on.
- SSL for origin: Enable if your application uses SSL internally.
It’s recommended to run one process per container. If running multiple
processes, ensure they use different ports.
- Click Add Endpoint.
Sticky sessions
Sticky sessions ensure all requests from a client are routed to the same server instance, maintaining session state across requests. To enable sticky sessions:- In the endpoint configuration, select Sticky Session.
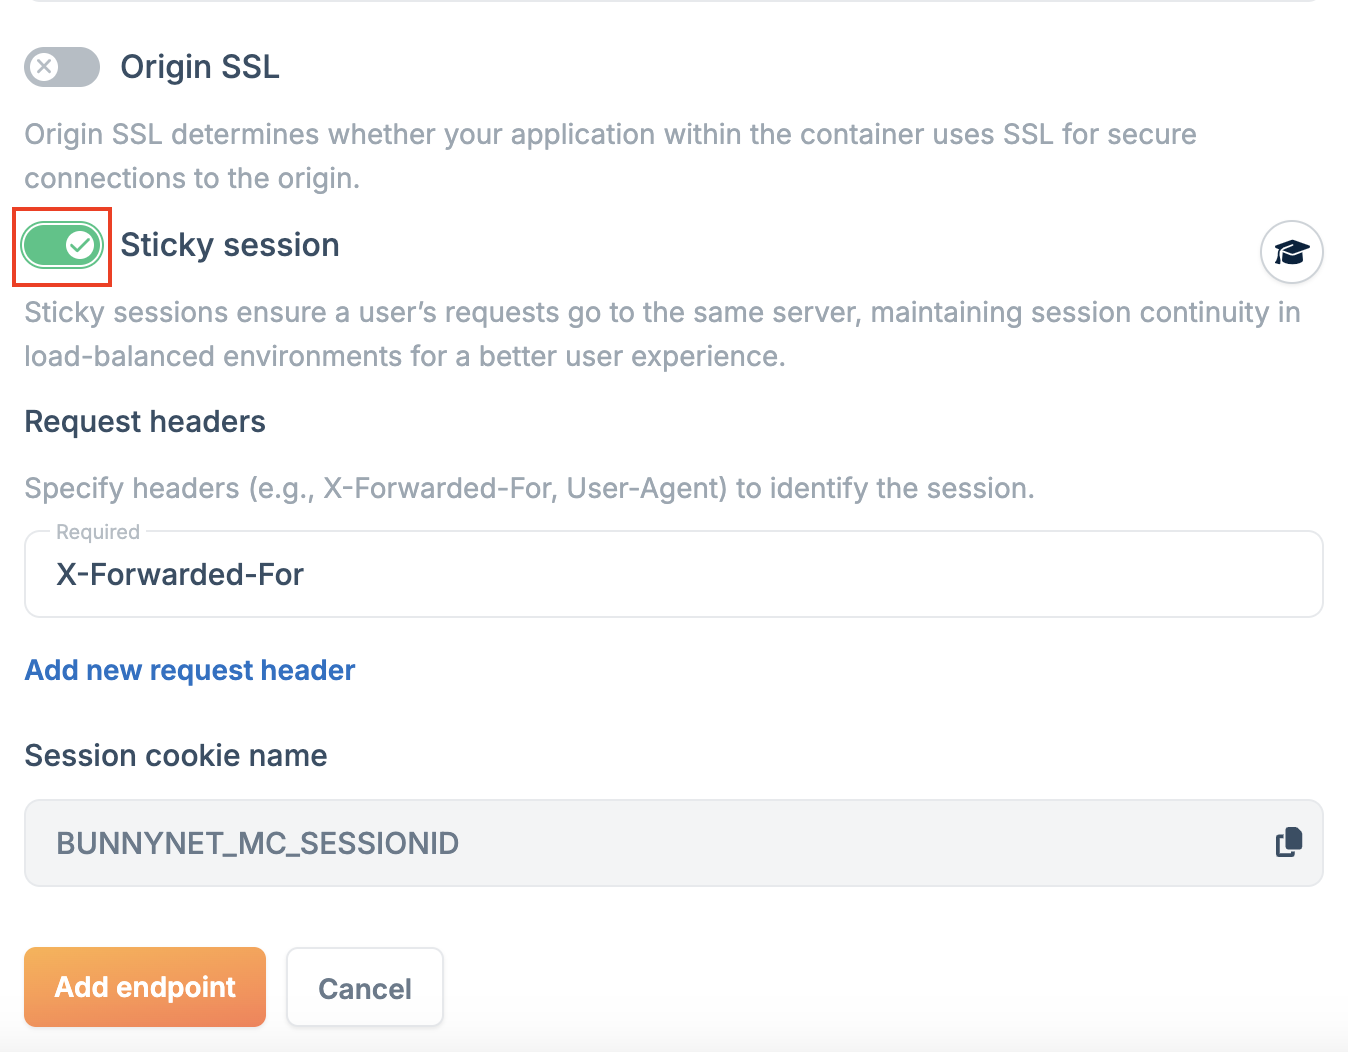
-
Choose an identifier (headers like
X-Forwarded-FororUser-Agent, or cookies likeSessionID). - Click Add Endpoint.
Anycast
Anycast endpoints map your container to an Anycast IP address, routing requests to the nearest node for improved performance. To create an Anycast endpoint:- Go to Magic Containers and select your container.
- Click Endpoints, then Add New Endpoint.
- Select Anycast as the type.
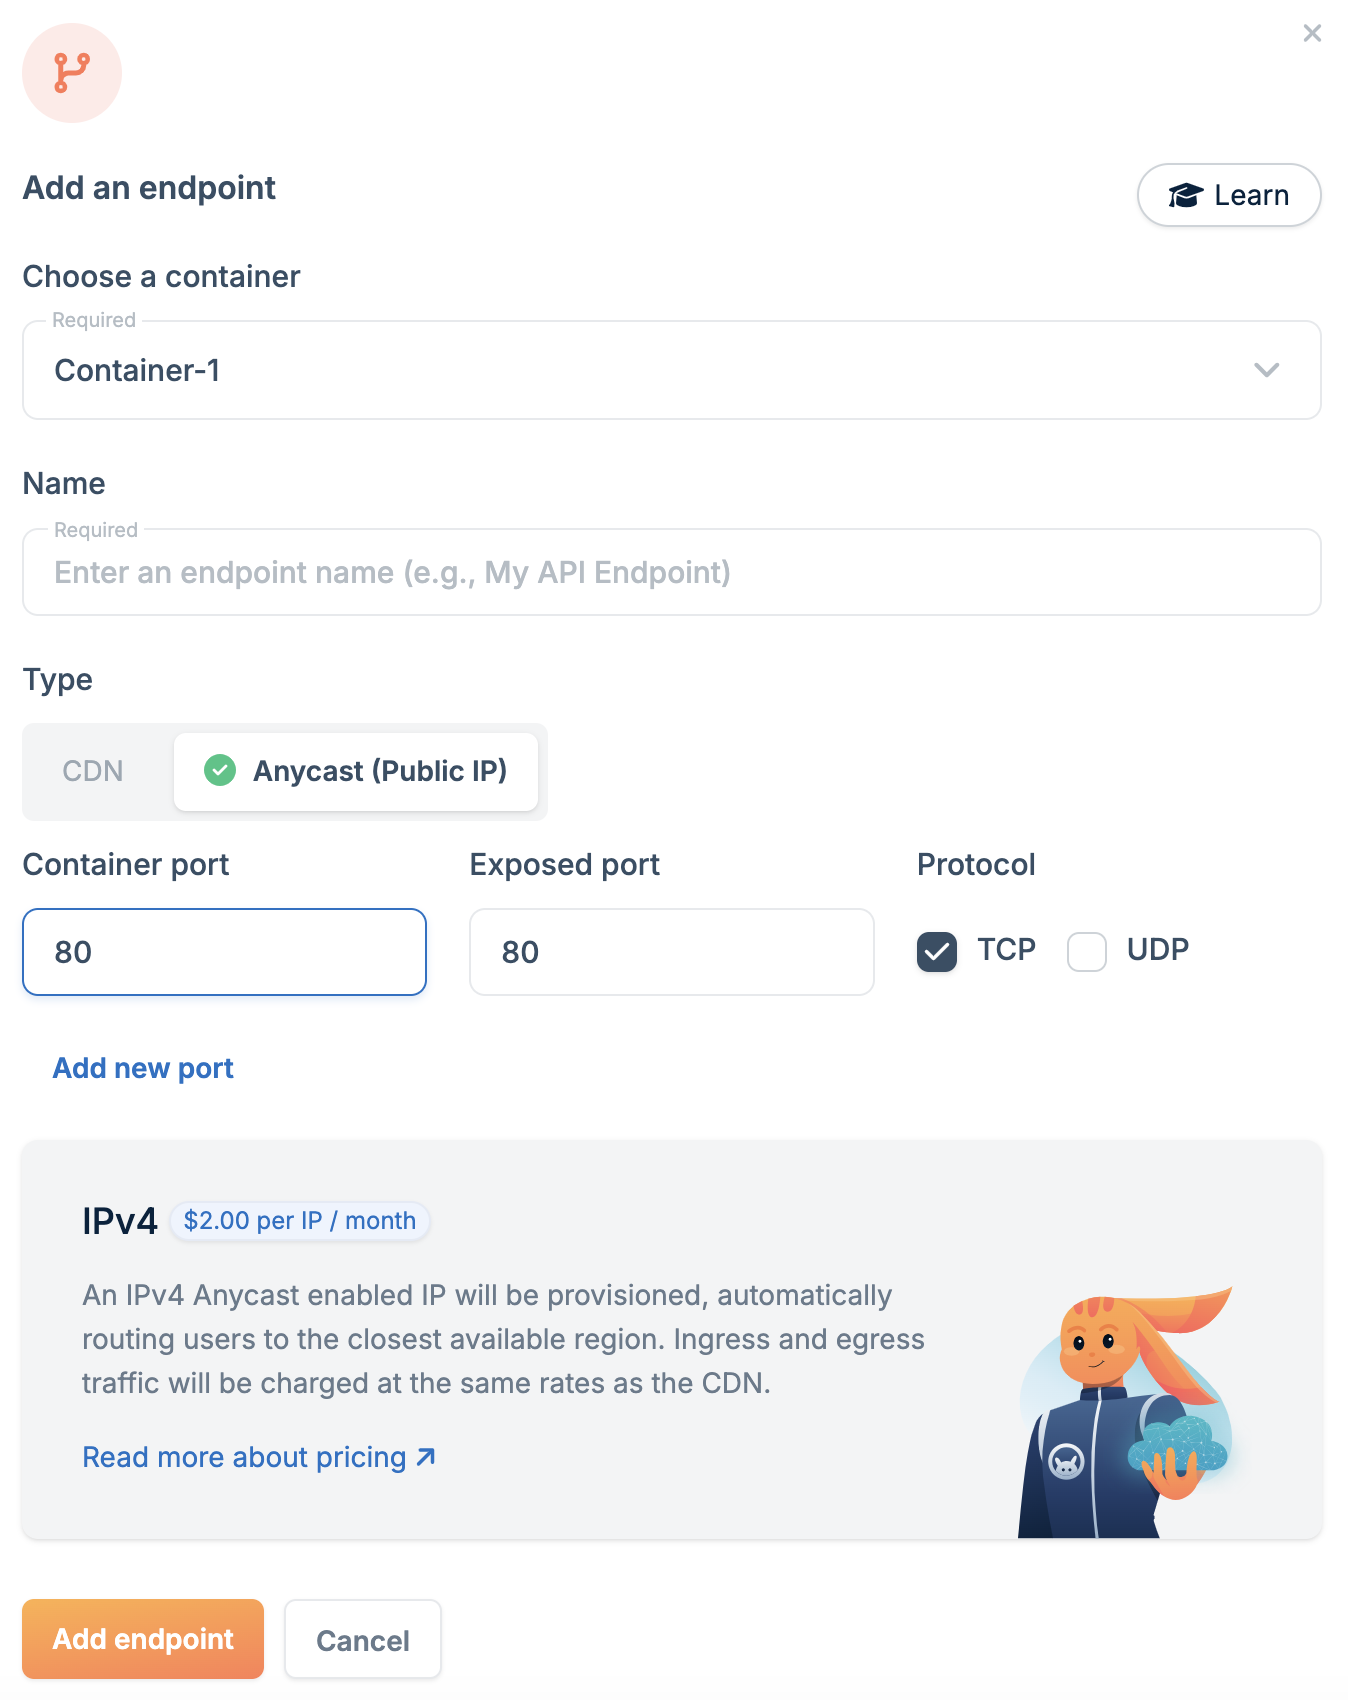
-
Configure the endpoint:
- Name: A unique name for this endpoint.
- Container Port: The port your application listens on inside the container.
- Exposed Port: The port available on the Anycast IP.
- Click Add Endpoint.