Select a container image
From the Quick Deploy page, use the search field to find a container image. The search pulls from all registries connected to your dashboard, including DockerHub Public, GitHub Public, and any private registries you’ve added.
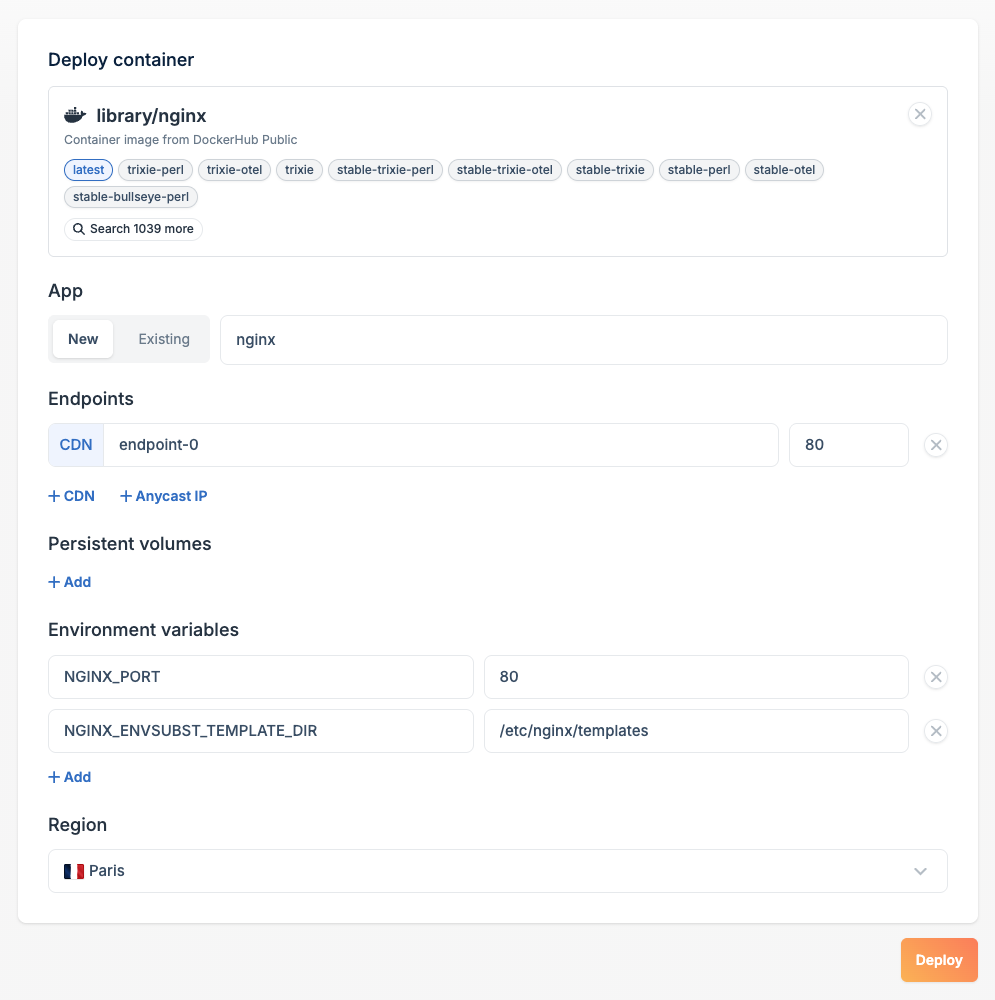
latest tag exists, it is selected automatically. You can switch to any other tag before deploying.Choose or create an app
Under App, decide whether to deploy into a new app or add this container to an existing one:
- New: enter a name for your new app. The image name is pre-filled as a sensible default.
- Existing: select an app you’ve already created to add this container alongside its current containers.
Configure endpoints
Endpoints define how your container is reachable from the internet. Two endpoint types are available:
- CDN: routes traffic through bunny.net’s CDN edge network. Best for HTTP/HTTPS services that benefit from caching and global distribution.
- Anycast IP: exposes your container directly via a globally anycast IP. Better suited for non-HTTP protocols or latency-sensitive TCP/UDP services.
Add persistent volumes (optional)
If your container needs to write data that should survive restarts or redeployments, add a persistent volume under Persistent Volumes. Click + Add and specify the mount path inside the container.Leave this section empty if your container is stateless.
Set environment variables
Under Environment Variables, configure any runtime settings your container needs. Quick Deploy inspects the image metadata and pre-fills known environment variables with common default values. Review each one before deploying.Pay special attention to:
- Passwords and secrets: replace any placeholder values with strong, unique secrets. Never leave default or example passwords in production.
- Paths and ports: confirm that pre-filled values match your actual container configuration.
Pick a region
Under Region, Quick Deploy automatically selects the region geographically closest to you. You can change this to any available region using the dropdown if you need to deploy closer to your users or a specific data source.
