TYPO3 can serve assets through Bunny CDN using the Content Replacer extension, which rewrites the content URLs on your site. This guide walks you through the setup.
Create a Pull Zone
Log in to your bunny.net dashboard and create a new Pull Zone with your TYPO3 site as the origin URL. For details, see How to create your first Pull Zone.Match the protocol of your site exactly. If your TYPO3 site runs on HTTPS, enable HTTPS on the Pull Zone; if it runs on HTTP only, leave HTTPS disabled. A mismatch will cause errors. Install the Content Replacer extension
If your TYPO3 install uses Composer mode, install the extension from the command line:composer req jweiland/replacer
Otherwise, install it through the Extension Manager in the TYPO3 web interface. Configure the Content Replacer
Go to Template, select the root page, enable Modify, and edit the entire template record.Scroll to the Setup box and paste the following, replacing 
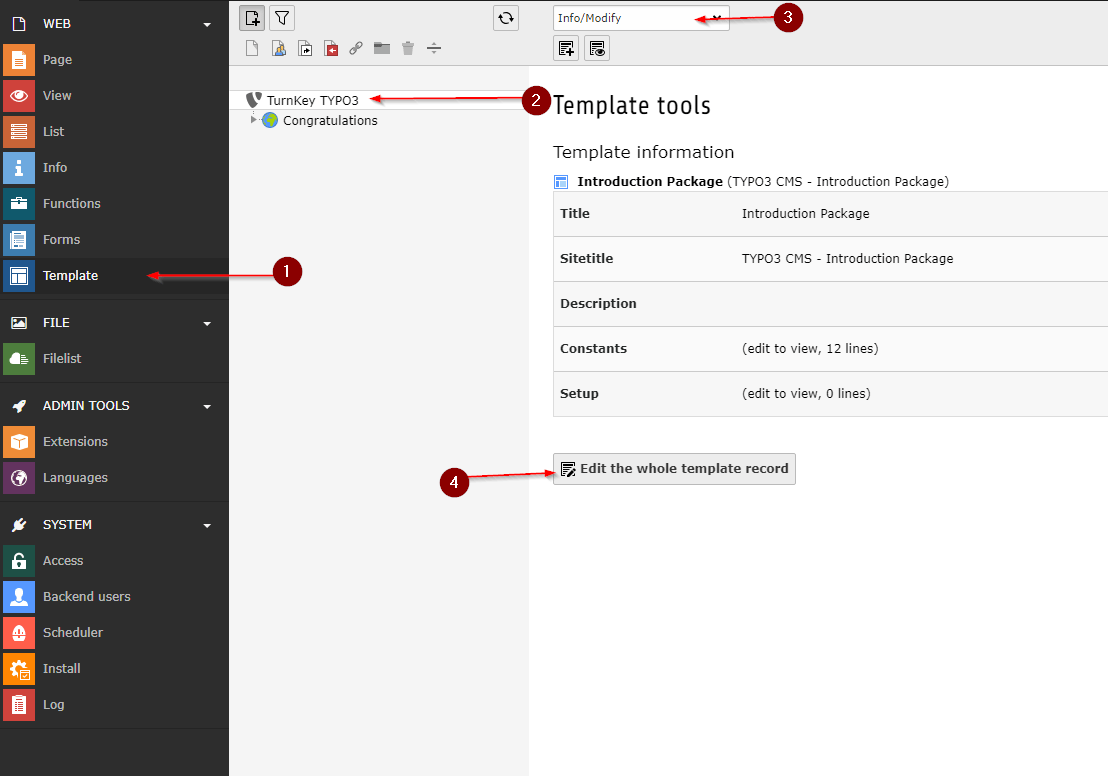
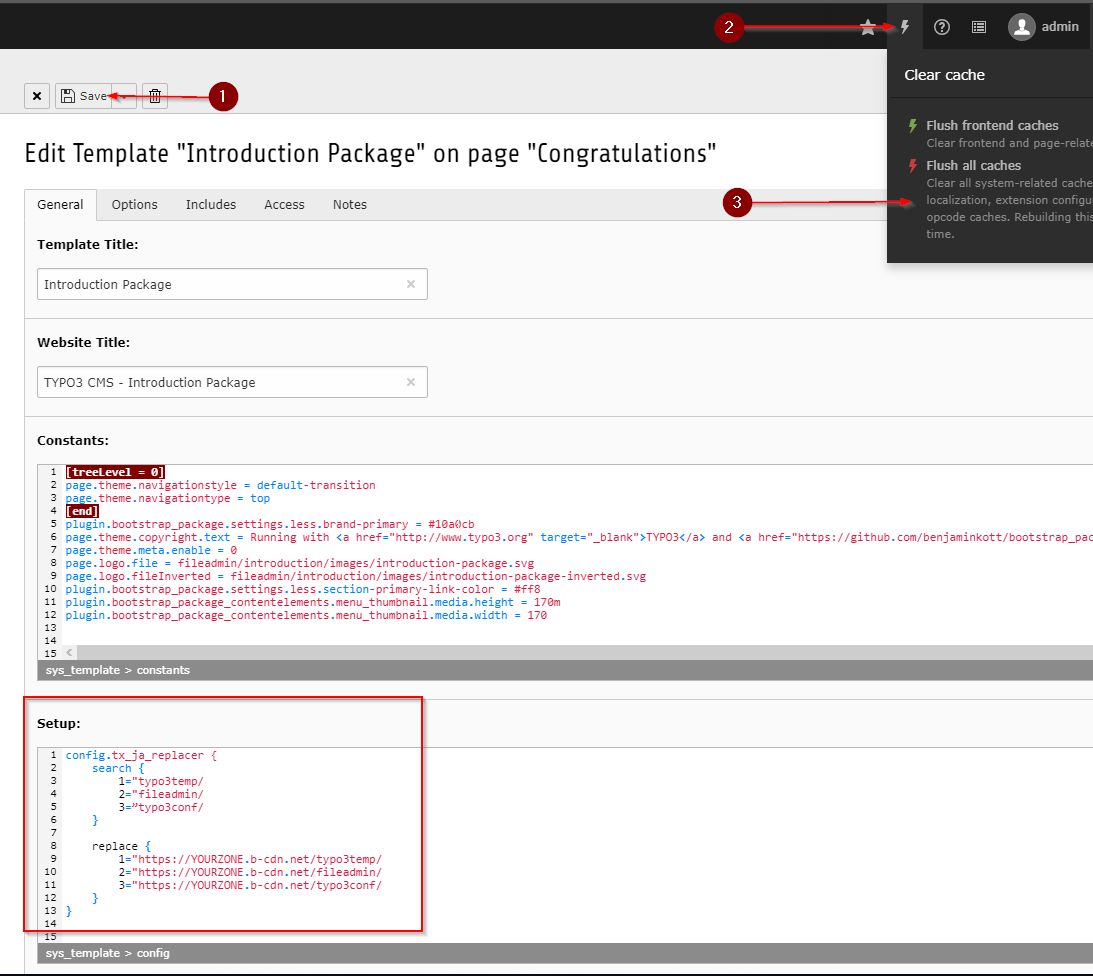
YOURZONE.b-cdn.net with your Pull Zone hostname:config.tx_ja_replacer {
search {
1 = typo3temp/
2 = fileadmin/
3 = typo3conf/
}
replace {
1 = https://YOURZONE.b-cdn.net/typo3temp/
2 = https://YOURZONE.b-cdn.net/fileadmin/
3 = https://YOURZONE.b-cdn.net/typo3conf/
}
}
Click Save, then select the lightning bolt and click Flush all caches.
Your TYPO3 site now serves static assets through Bunny CDN. Last modified on July 3, 2026