1
Create a Pull Zone
Log in to your bunny.net dashboard and create a new Pull Zone with your PrestaShop store as the origin URL. Match the protocol (HTTP or HTTPS) of your site exactly. For details, see How to create your first Pull Zone.
2
Open the Performance panel
Log in to your PrestaShop admin panel and go to Advanced Parameters → Performance.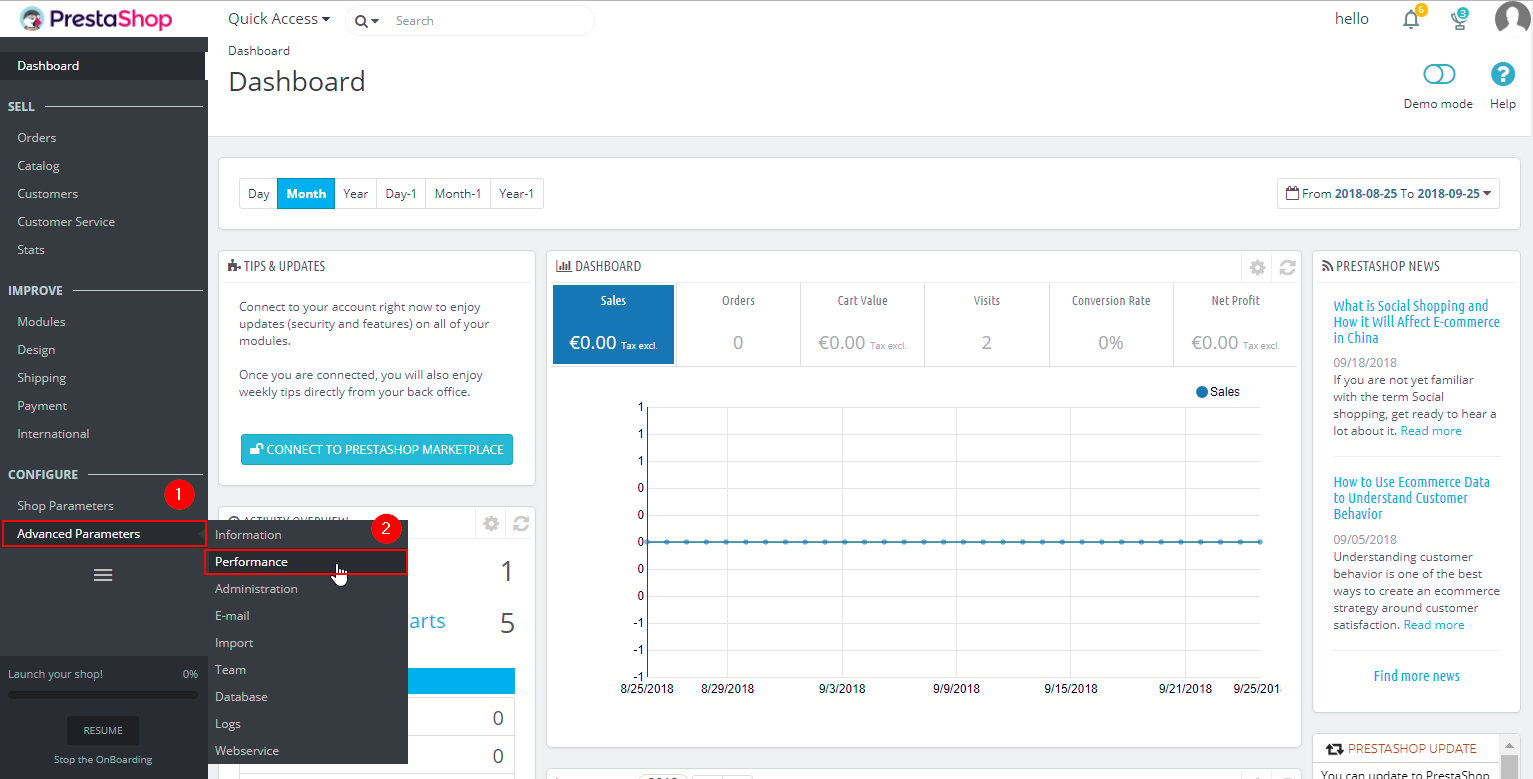
3
Configure the CCC section
In the CCC (Combine, Compress and Cache) section, set Smart cache for CSS and Smart cache for JavaScript to Yes.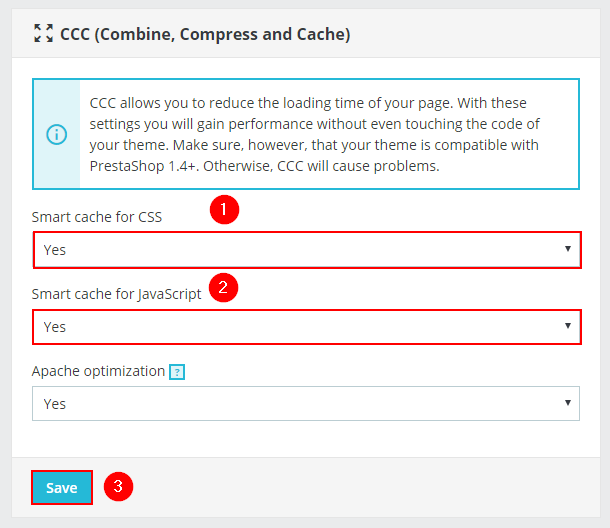
On older versions of PrestaShop, this section shows checkboxes instead of dropdowns. In that case, select Use CCC for CSS and Use CCC for JavaScript.
4
Configure the Media Servers
Scroll down to the Media Servers section and enter your Pull Zone hostname in the Media server #1 field. Click Save.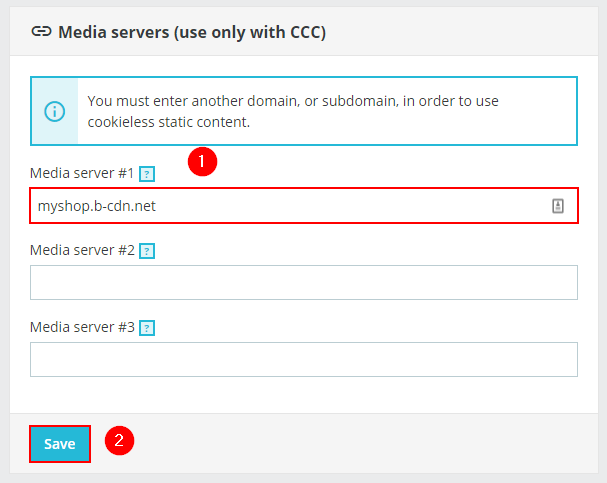
5
Clear the cache (optional)
If caching is enabled for your store, click Clear cache at the top of the page. Your pages will now be served through Bunny CDN.