

The free version of the CDN for Joomla plugin only supports HTTP URLs. To use HTTPS URLs, you’ll need the paid version.
1
Install the CDN for Joomla plugin
Download the plugin from the Regular Labs site. In your Joomla admin, go to Extensions → Manage → Install, then upload the ZIP file you downloaded.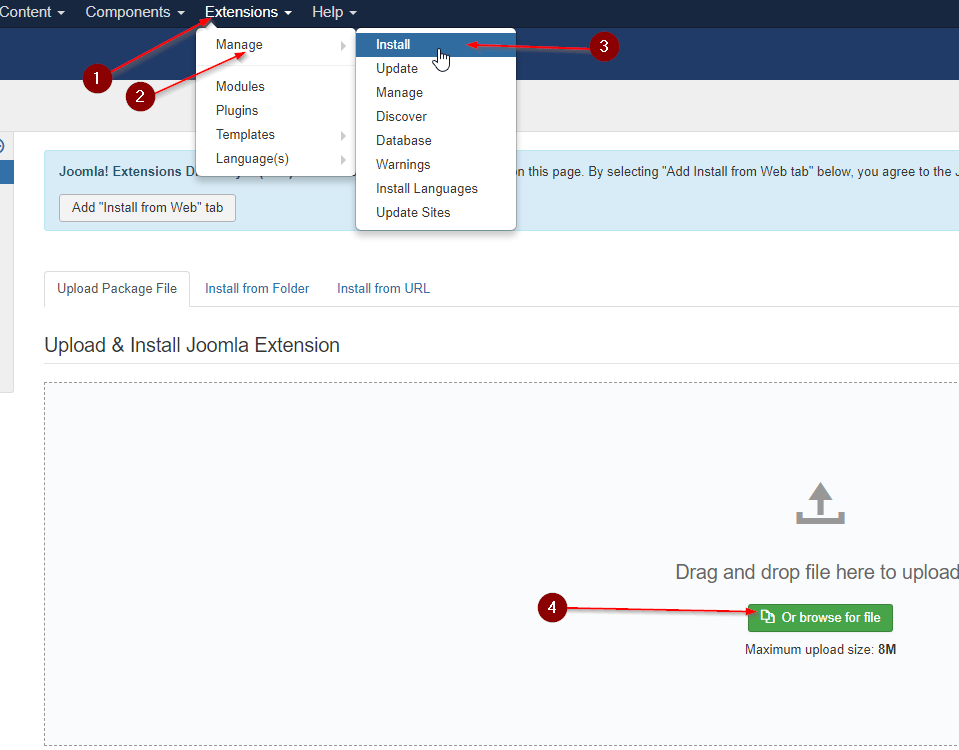
2
Open the plugin configuration
Go to Extensions → Manage → Manage, use the search to find the CDN plugin, then click it to open its configuration page and switch to the Setup tab.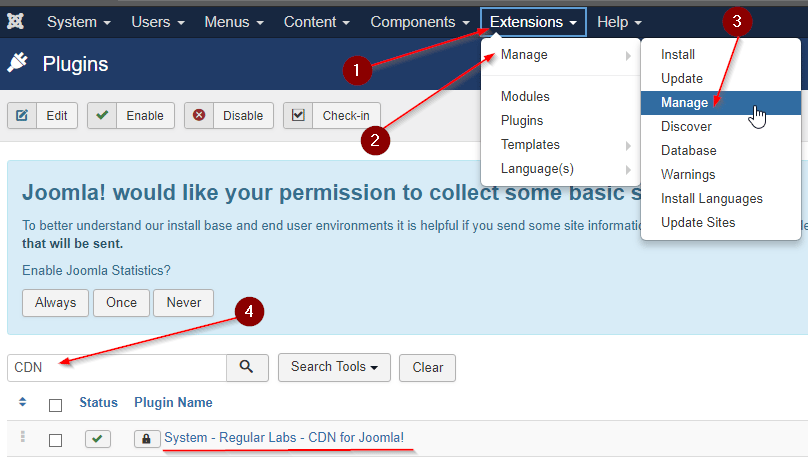
3
Create a Pull Zone
In your bunny.net dashboard, create a new Pull Zone with a name, set the origin URL to your website, choose your tier, and click Add Pull Zone. For details, see How to create your first Pull Zone.
4
Set the CDN Domain
Back on the plugin’s Setup tab, enter your Pull Zone hostname (the 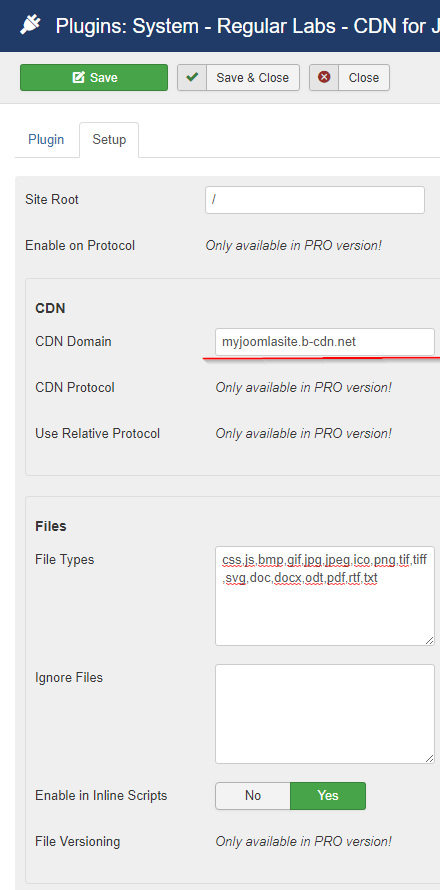
b-cdn.net hostname) in the CDN Domain field, then click Save.