

1
Configure your Space and get its URL
Set up your Space and upload some content, following DigitalOcean’s Spaces quickstart. Note the Space URL shown on the Create a Space page, you’ll use it as your Pull Zone origin.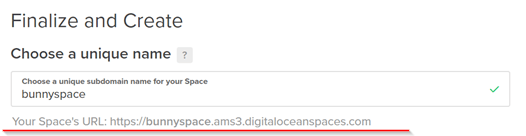
Disable DigitalOcean’s built-in Spaces CDN. Leaving it enabled interferes with Bunny CDN.
2
Create a Pull Zone
Log in to your bunny.net dashboard and create a new Pull Zone. Give it a name and set the origin URL to your Space URL from the previous step, then choose your pricing and region tiers and click Add Pull Zone. For details, see How to create your first Pull Zone.
3
Test your Pull Zone
Upload some files to your Space and make sure their permissions are set to Public, so Bunny CDN can fetch and cache them. Once the configuration has synced to the edge network, request a file through your Pull Zone hostname. For example:becomes:If the
b-cdn.net URL serves the file, Bunny CDN is caching content from your Space. Replace your Space URLs with the Bunny CDN URLs in your application to start serving cached content.