Offloading is only supported when using the official bunny.net plugin and managing DNS through bunny.net. It is not compatible with third-party plugins or external DNS providers.
Prerequisites
- A bunny.net account
- Access to manage your domain’s DNS settings
How it works
The Offloader requires that your domain uses Bunny DNS with CDN Acceleration enabled. Offloading cannot function if your domain is managed by another DNS provider or lacks acceleration.Step 1: Migrate your domain to Bunny DNS
Skip this step if your domain is already using Bunny DNS.Add a DNS zone
Log in to bunny.net and go to Delivery → DNS → Add DNS Zone. Enter your domain name and click Add DNS Zone.
Add your DNS records
Follow the setup instructions, then click Okay, I’m done. Click Add Record, enter the required details, and continue adding records as needed.
Verify propagation
Confirm your DNS settings have propagated using the bunny DNS Lookup Tool. Look for NS records pointing to
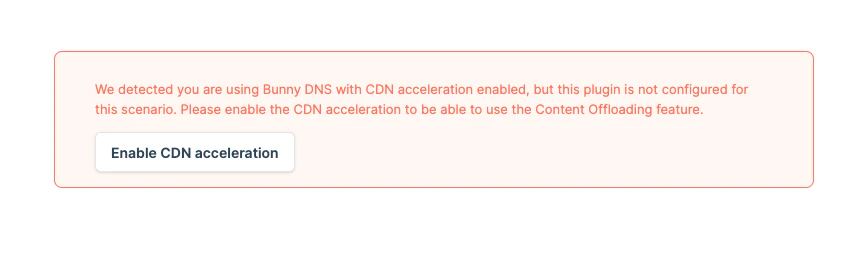
kiki.bunny.net or coco.bunny.net.Step 2: Enable CDN Acceleration in the plugin
If your domain was already using Bunny DNS when you installed the plugin, the “Enable CDN Acceleration” option may not appear. Skip to Step 3 to check if it’s already enabled. If not, you can reset the plugin to start the configuration from scratch.
Enable CDN Proxy on DNS records
In the bunny.net dashboard, go to the DNS section. Click the button in the CDN Proxy (or CDN acceleration) column next to each DNS record.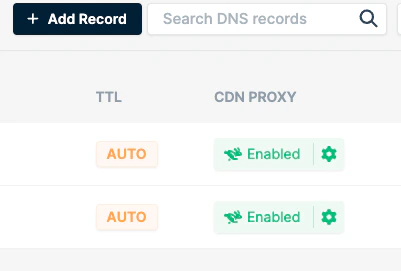
Step 3: Confirm CDN Acceleration is working
Verify your setup using any of these methods:- In the bunny.net DNS section, a green CDN Proxy icon next to your DNS record indicates proper CDN integration.

- Inspect response headers from your site. Look for:
CDN-ProxyVer: 1.04CDN-RequestPullSuccess: TrueCDN-RequestPullCode: 200
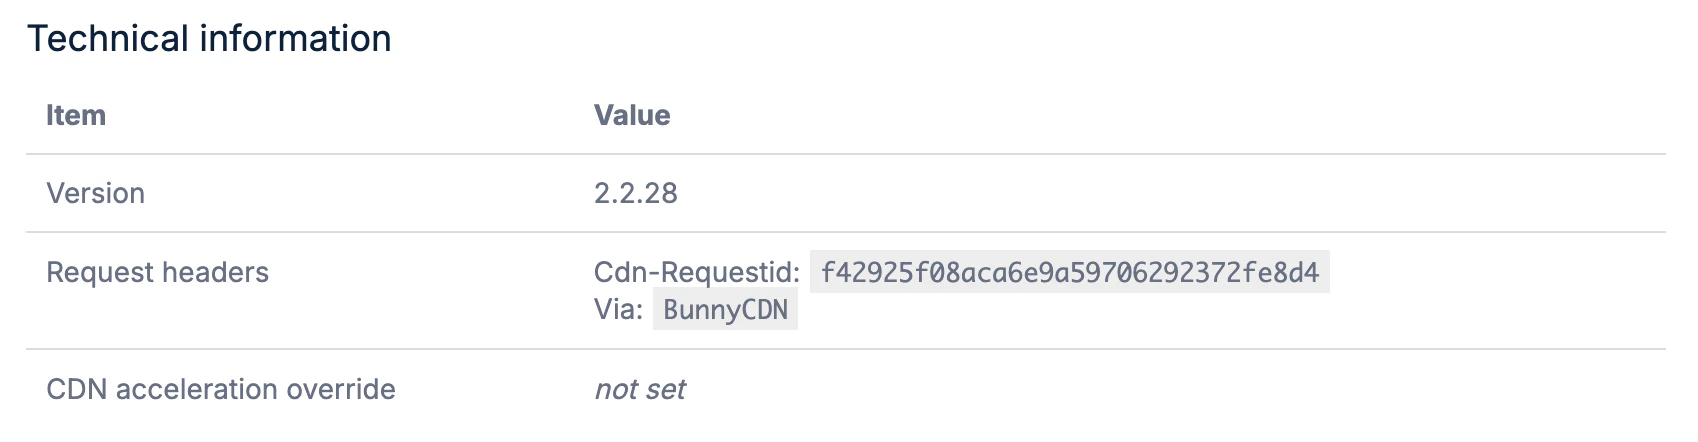
- In your WordPress Admin Panel, go to bunny.net → About. Under Technical Information, check the Request Headers section. If you see both
Cdn-RequestIdandVia: BunnyCDN, everything is working.
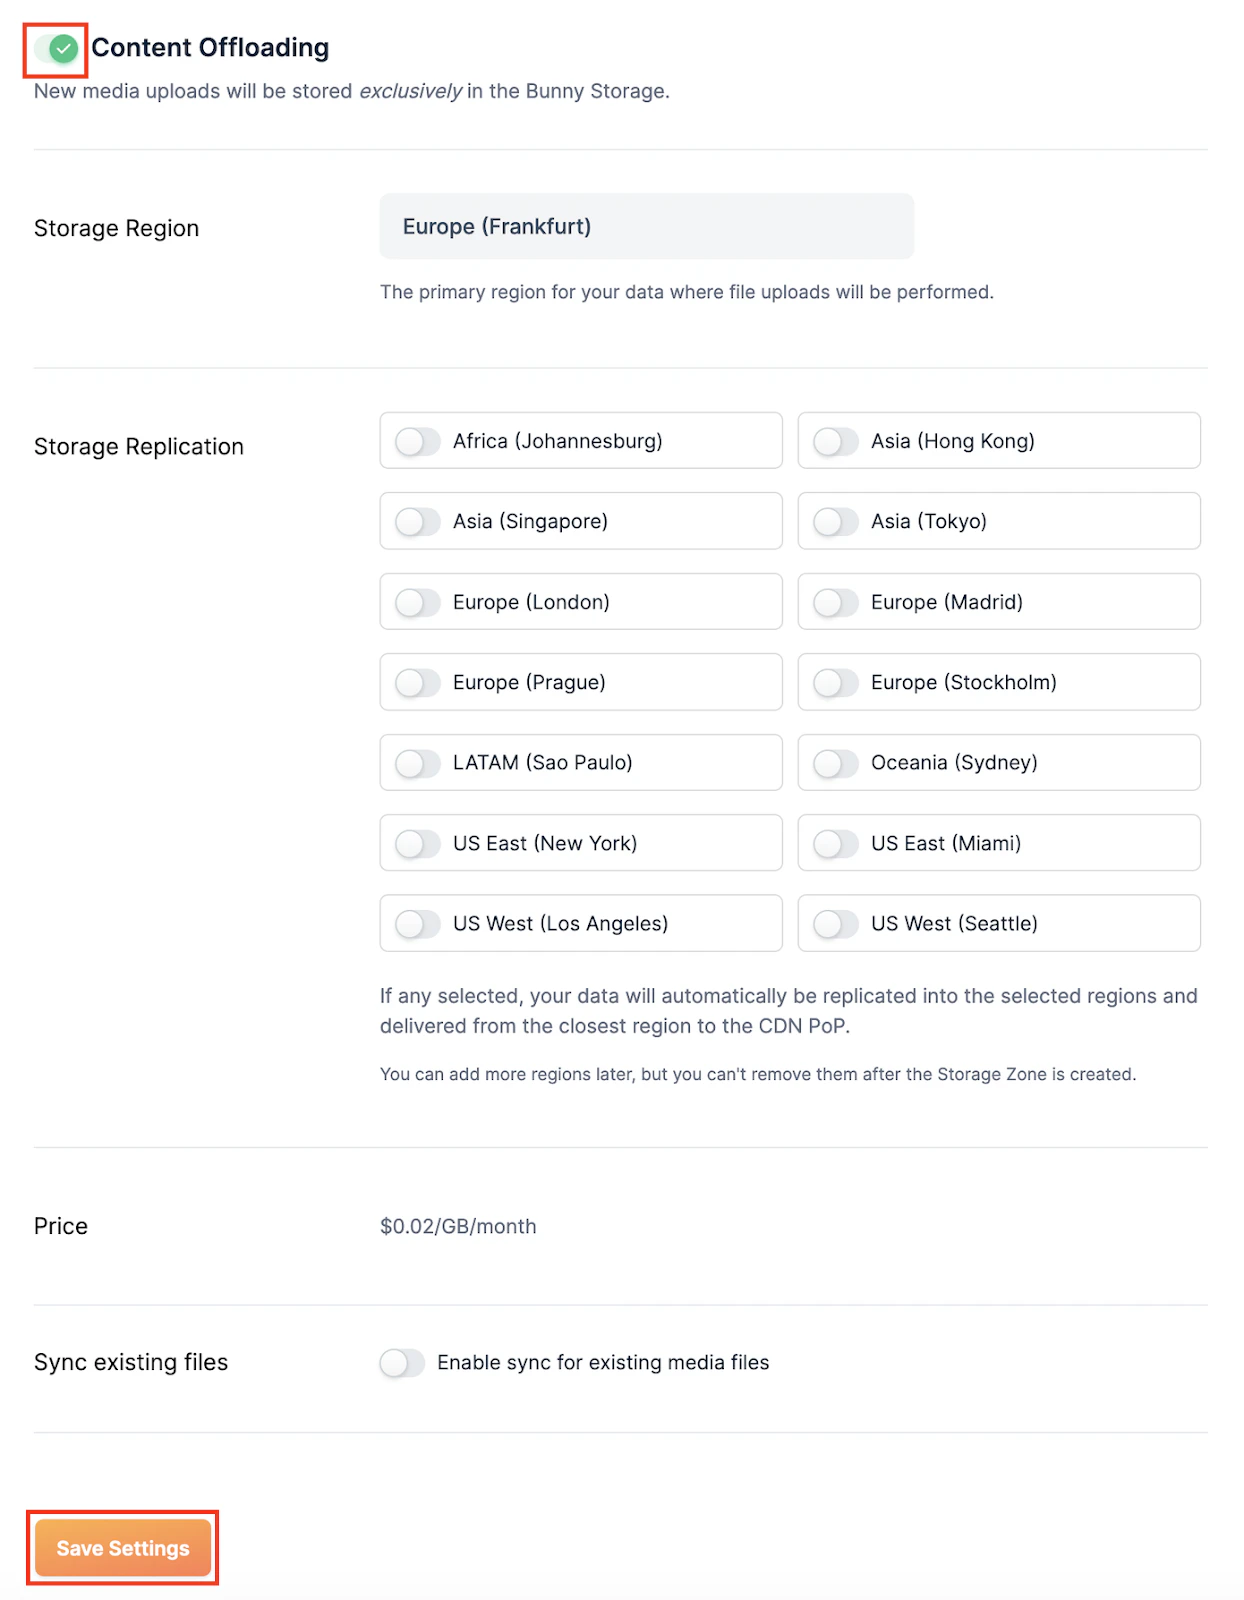
Step 4: Enable the Offloader
In your WordPress Admin Panel, navigate to bunny.net → Offloader. Toggle on Content Offloading, adjust settings to your preference, and click Save Settings.