1
Create a Pull Zone
Log in to your bunny.net dashboard, create a new Pull Zone, and set the origin URL to your WordPress site. For more details, see How to create your first Pull Zone.
2
Install W3 Total Cache
In your WordPress admin, go to Plugins → Add New. Search for W3 Total Cache, click Install Now, then Activate.
3
Enable the CDN module
Go to Performance → General Settings and scroll down to the CDN section. Set the CDN Type to Generic Mirror, check the Enable checkbox, and click Save all settings.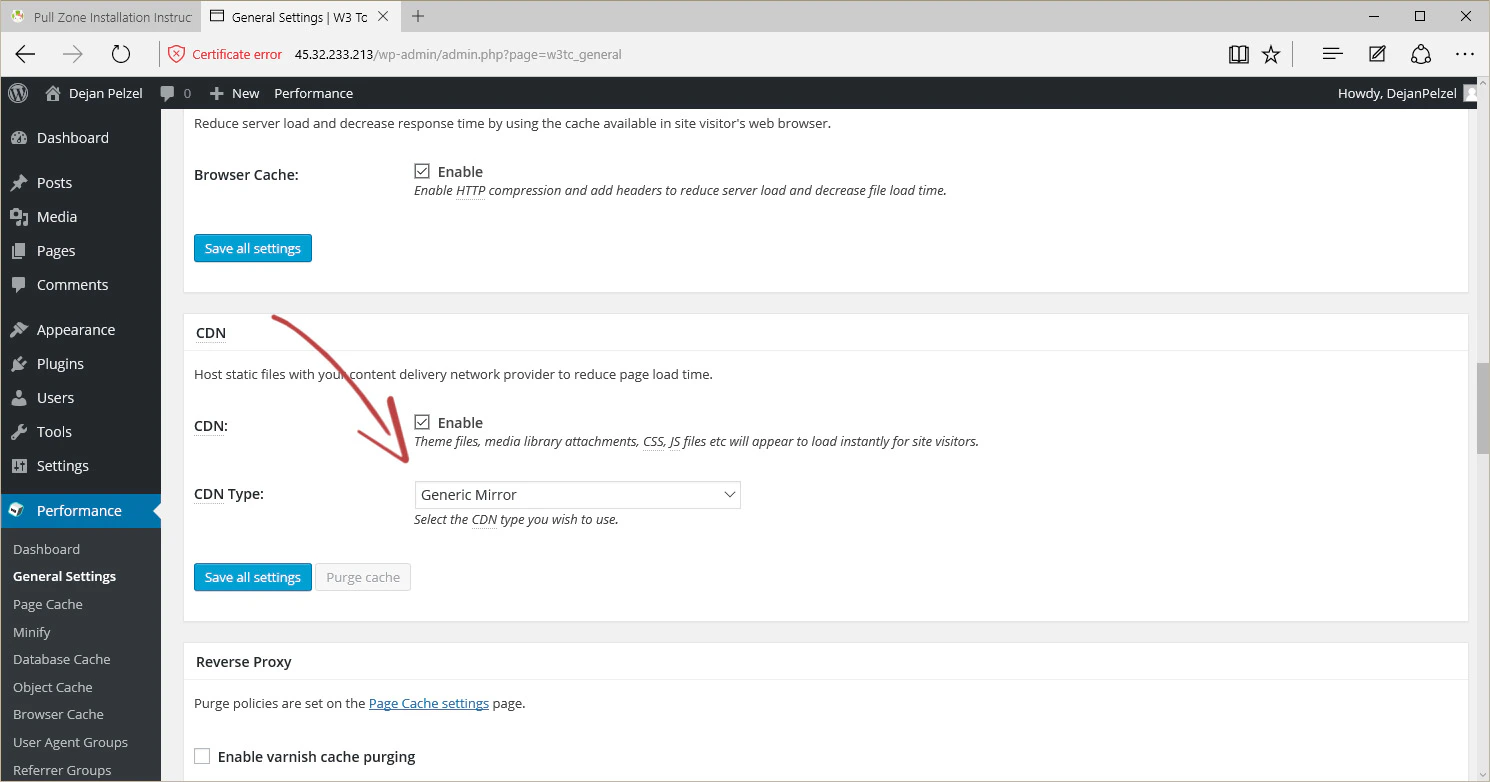
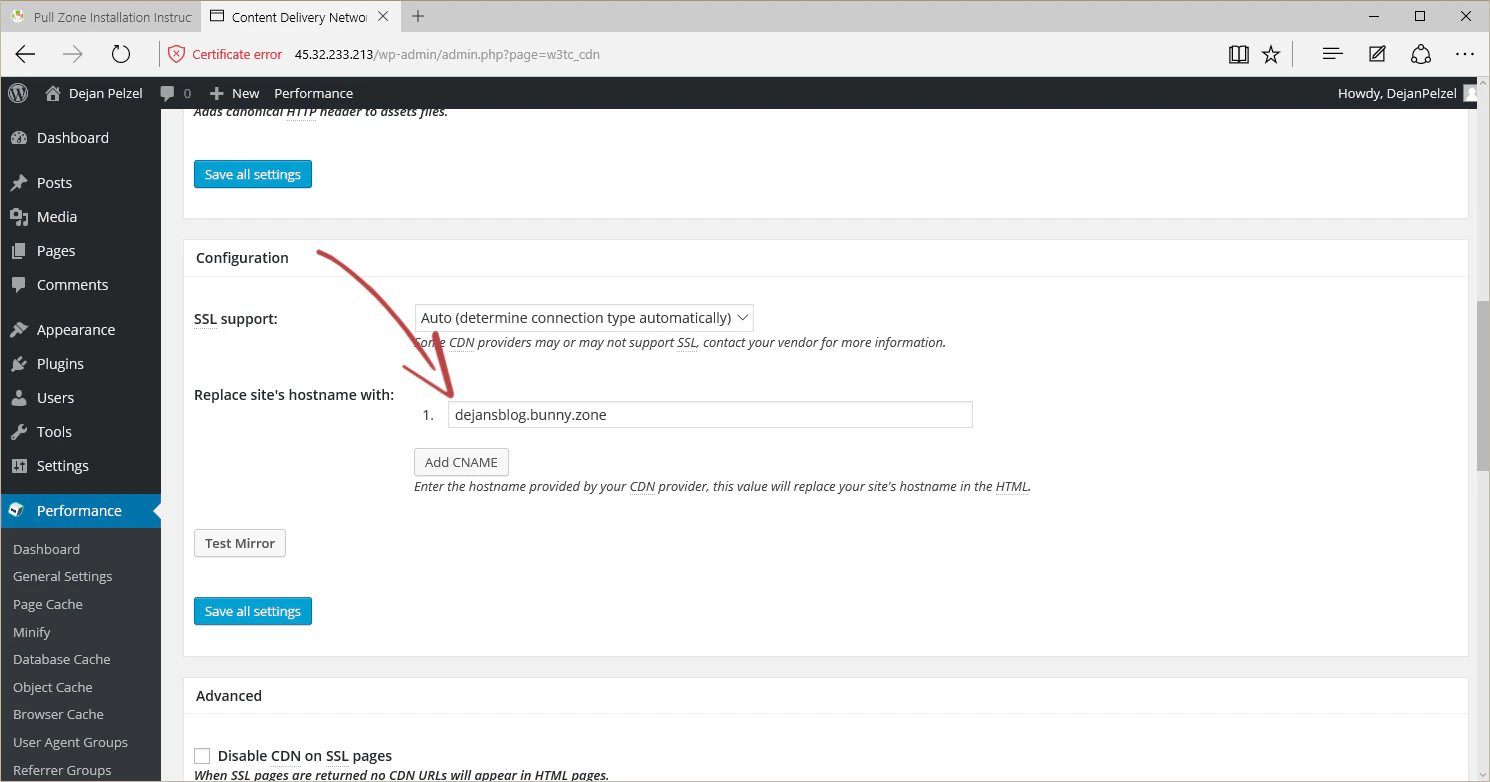
4
Configure the CDN hostname
Go to Performance → CDN in the sidebar. Scroll down to the configuration section and enter your Pull Zone hostname in the Replace site’s hostname with field. Click Save all settings.