What you’ll need
Before you dive in, make sure you have the following prerequisites in place:- A bunny.net account ( Log in or sign up for a free trial).
- A video file you want to host.
Creating a video library
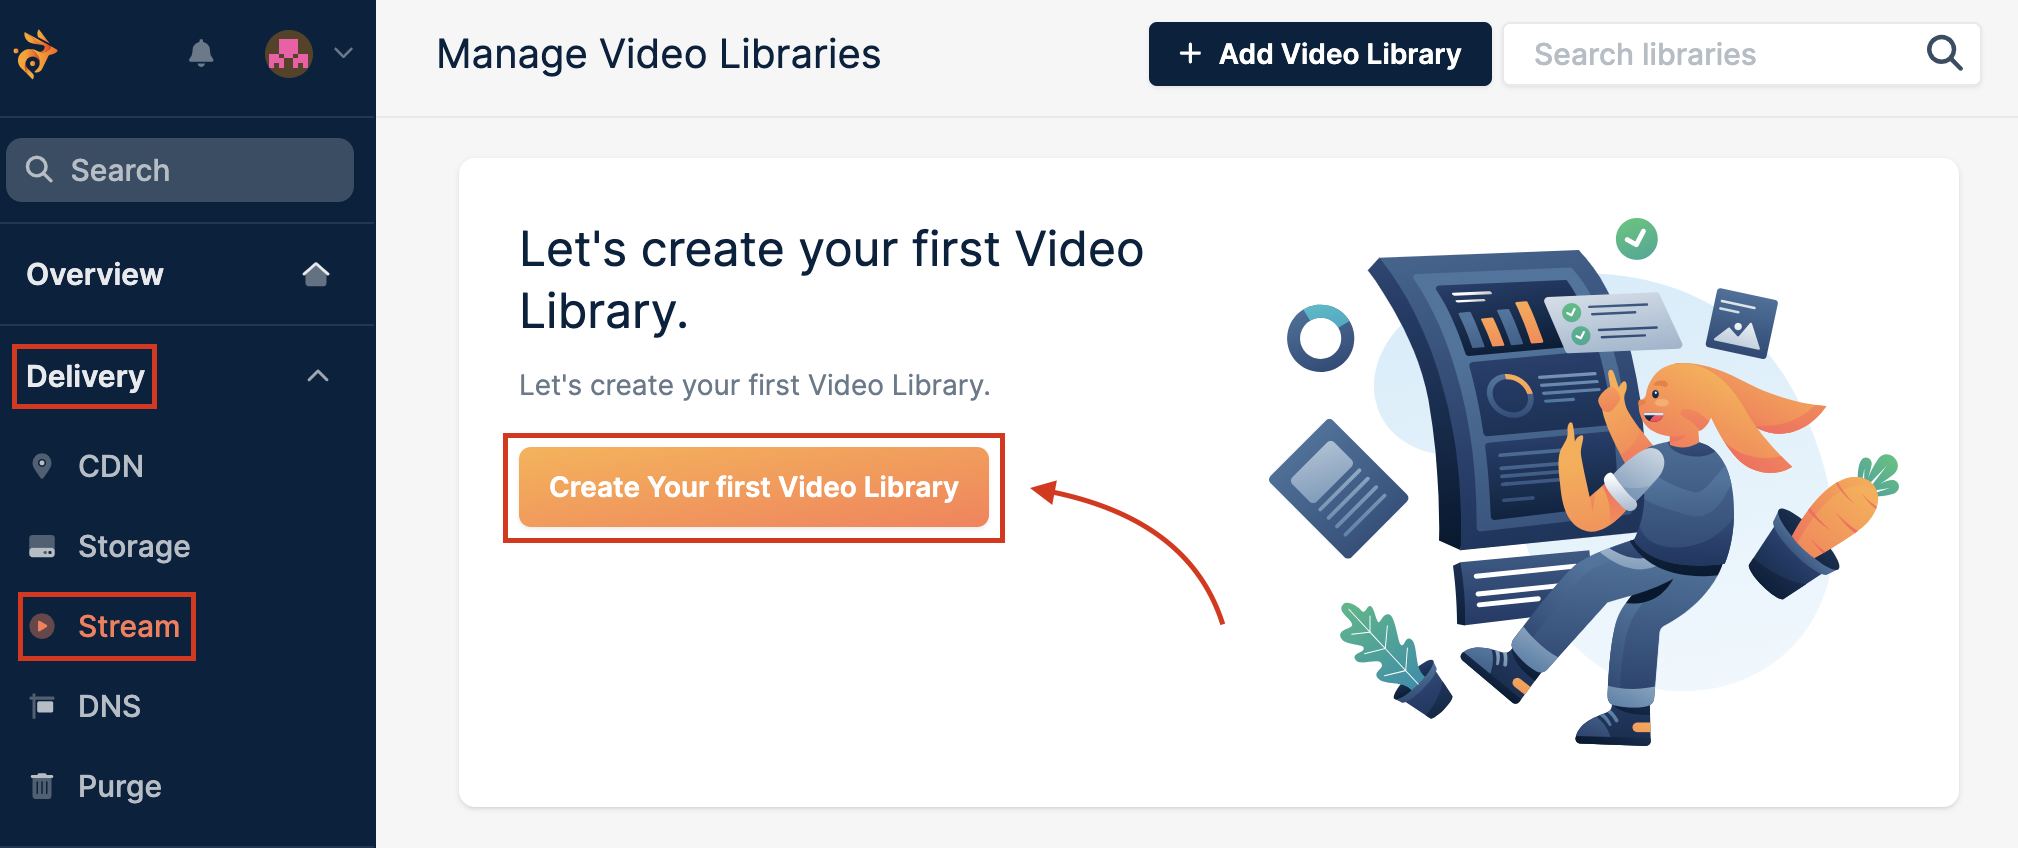
After signing up and logging into your bunny.net dashboard, you’ll need to set up a video library. A video library is essentially a container for your video content on bunny.net. To create a video library, follow the steps below:- Login to bunny.net dashboard.
- Go to Delivery -> Stream and click Create Your first Video Library.
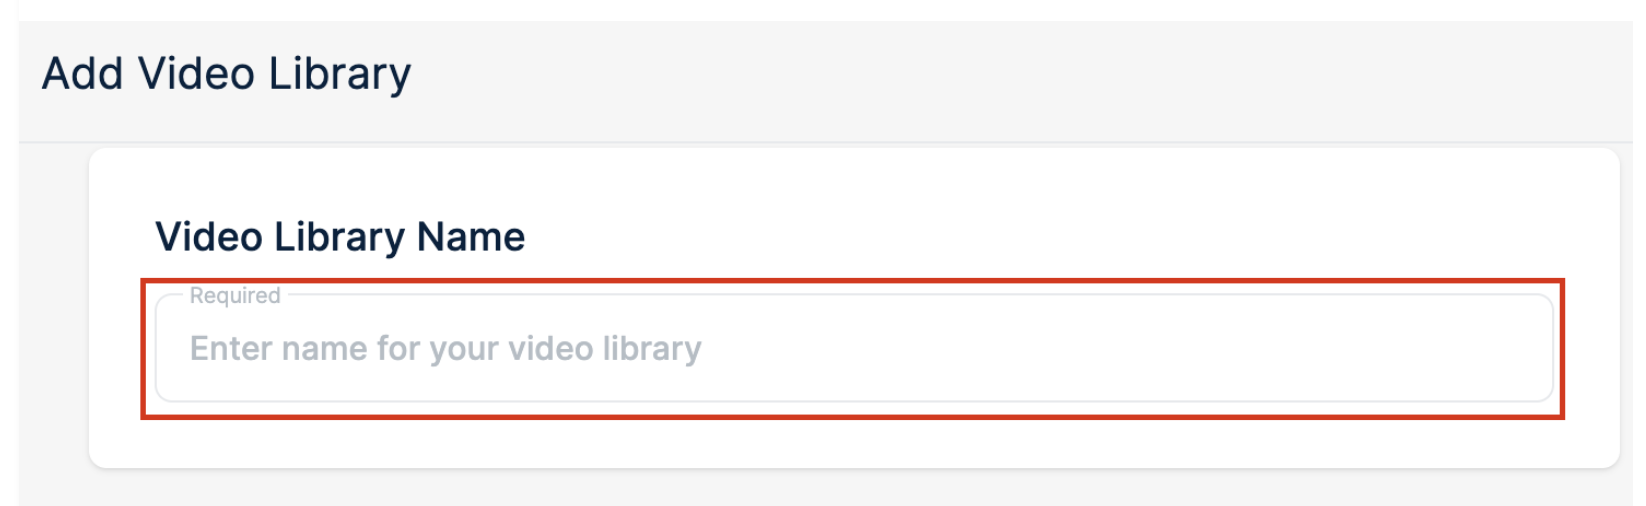
- Enter the name of your video library.
- The next step is to set up your video storage configuration. We recommend enabling at least 2 regions to assure data durability in case of a local hardware failure in a single region. To achieve optimal performance, we recommend enabling at least one storage region per continent.
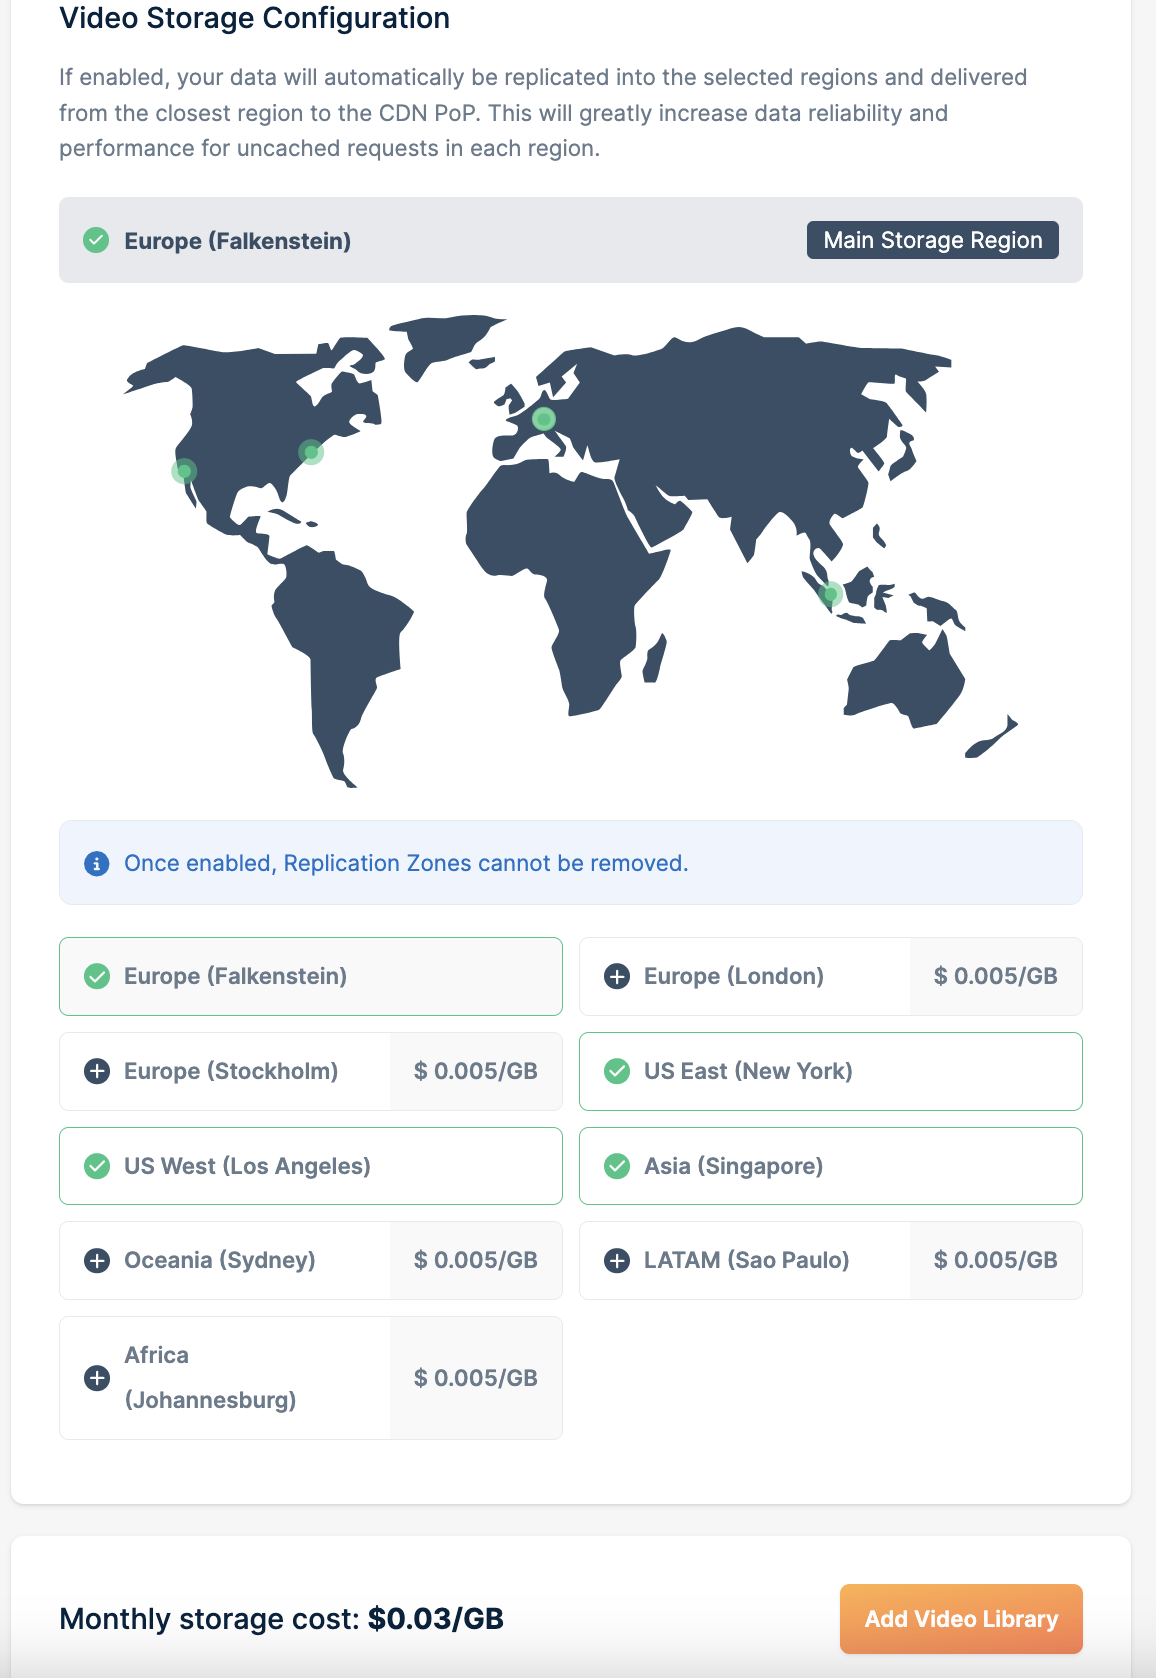
- After you set your configuration, click Add Video Library.
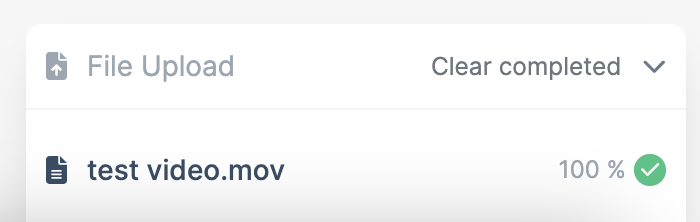
Uploading your video file
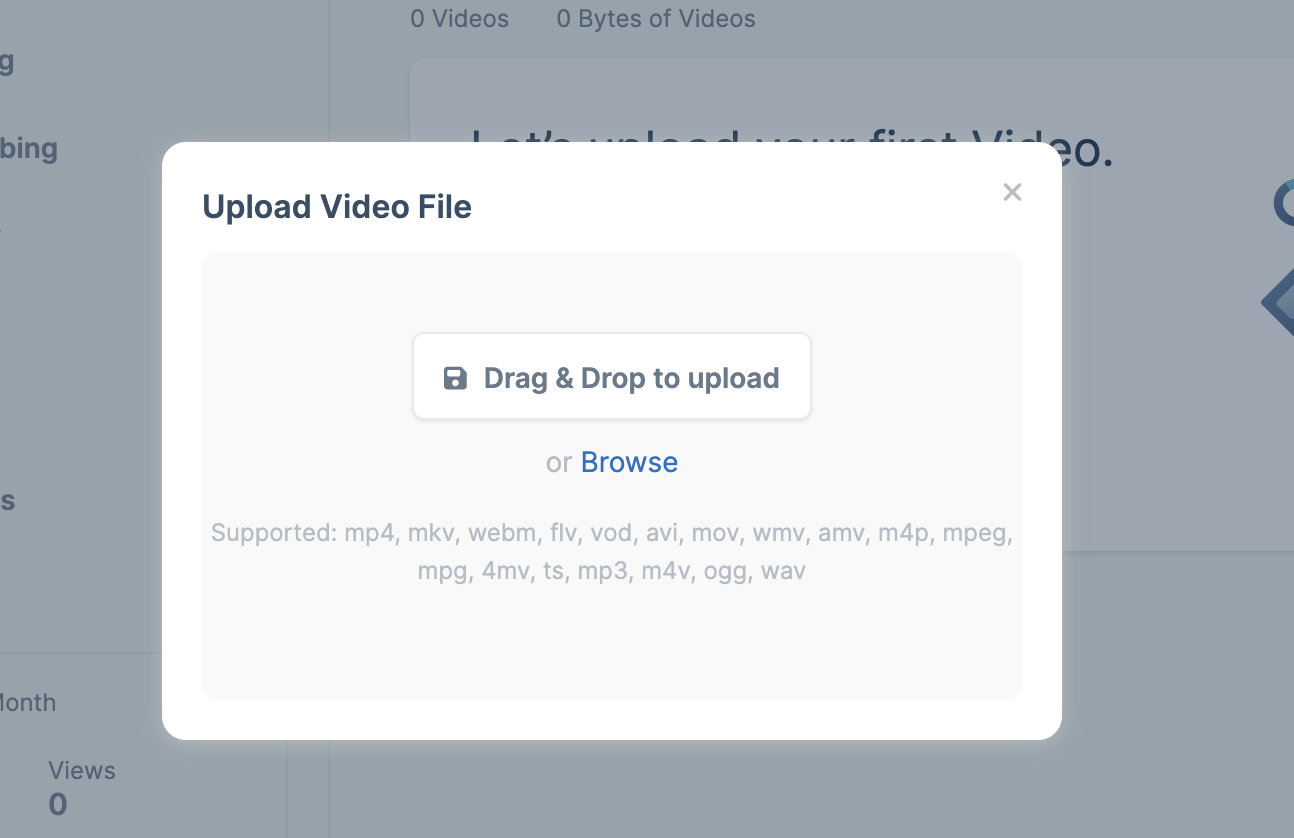
With your video library ready, it’s time to upload your first video:- Click Upload a Video.

- A new popup will open, allowing you to select or drag the video files which will automatically start the upload.
- bunny.net will then process and encode your video for optimal streaming across devices and bandwidths.
Getting the embed code or video URL
Once your video is uploaded and processed, you can integrate it into your website or share it directly with your viewers.Getting the video URL
To get the URL of your video click on the video and select Copy Video Play Url.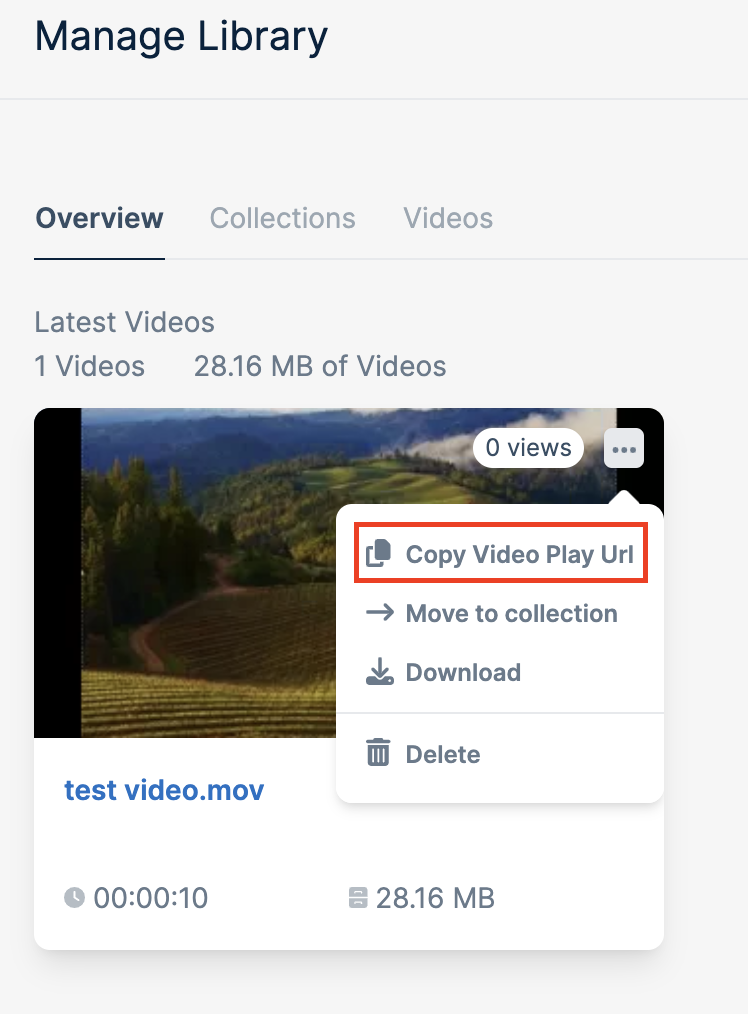
Embedding your video
To copy the embedded code of your video, simply click on the video and copy the embedded code.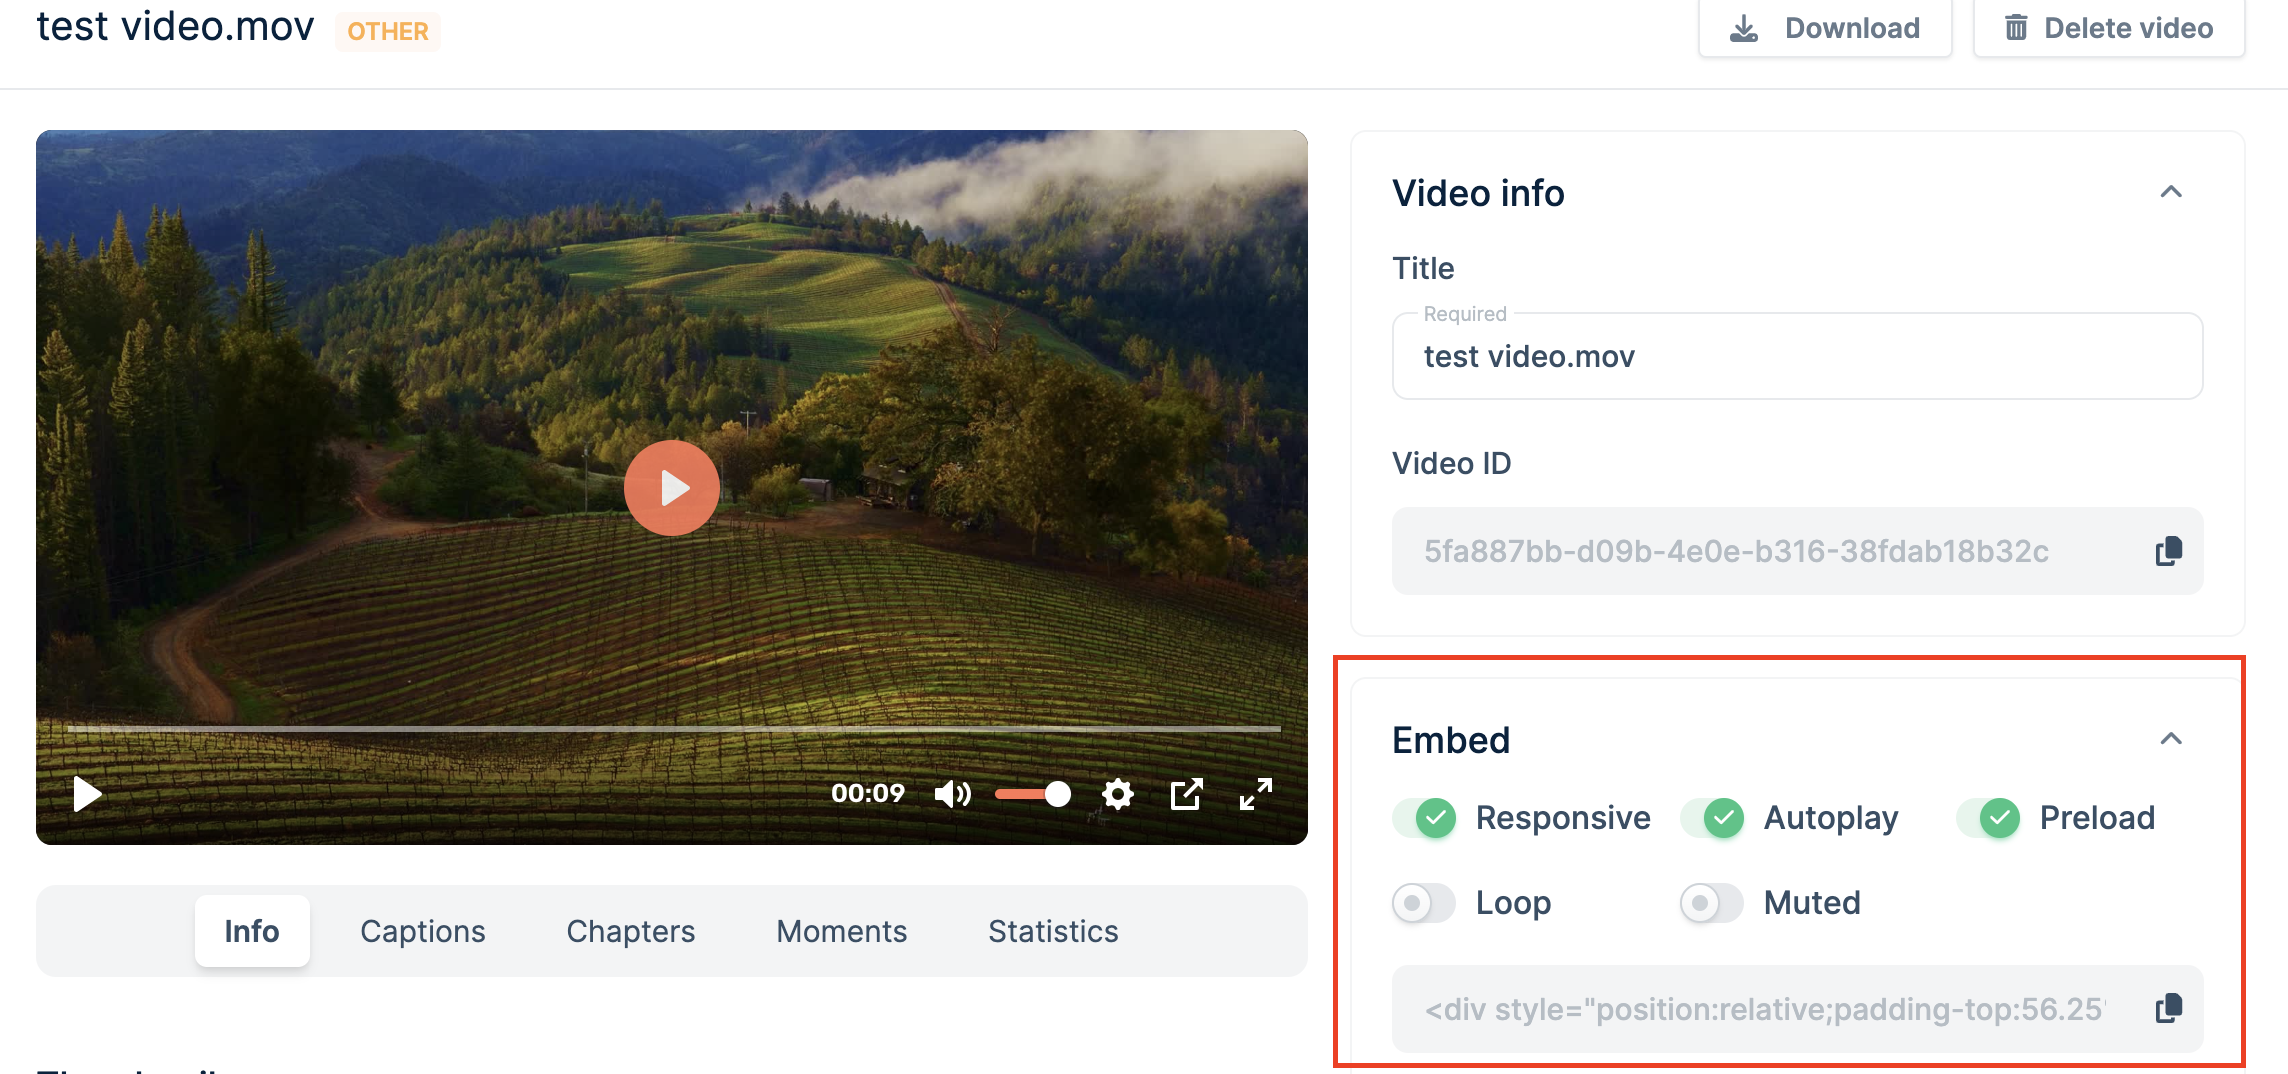
For more information regarding how to embed your video, see the Embedding Videos guide.